
Overview
The Proofpoint DLP (Intelligent Cloud Email Security / formerly Tessian) integration allows autobotAI to interact directly with Proofpoint. With this integration, you can automate workflows around DLP security events, user monitoring, email quarantine management, user groups, and audit trails via the Proofpoint REST API.
This guide provides instructions for setting up the Proofpoint DLP integration in your autobotAI account.
Prerequisites
Before starting, ensure you have:
- An active Proofpoint DLP account.
- A Proofpoint API Token with sufficient permissions ("Integrations" and "Security Events" roles).
- Your Proofpoint Subdomain and Region.
Instructions for retrieving your API Token can be found in the Additional Information section.
Steps to Set Up Proofpoint DLP Integration
Step 1:
Navigate to the Integrations page by selecting Integrations from the menu. Click the + Add Integration button in the top-right corner to view available integrations.

Step 2:
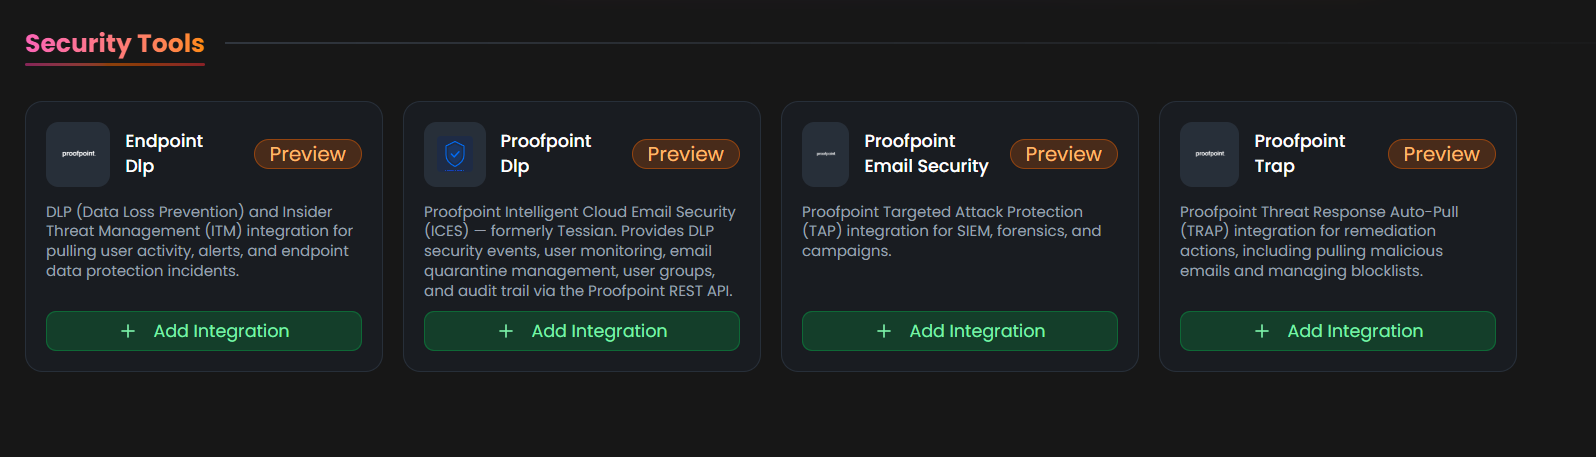
From the list, under Security Tools, select Proofpoint DLP + Add to create the Proofpoint DLP integration.
Step 3:
Fill in the required fields as follows:
Note: Fields marked with an asterisk (*) are mandatory.
-
Alias: Provide a meaningful name or alias for this integration (e.g.,
Proofpoint-Prod). -
Tag(Optional): Choose a tag to help organize the integration.
-
Subdomain: The subdomain of your Proofpoint Portal (e.g., if your portal is
https://yourcompany.tessian-app.com, enteryourcompany). -
Region: Select your Proofpoint hosting region (
USfor tessian-app.com orEUfor tessian-platform.com). -
API Token: Enter your Proofpoint API Token.
-
Skip Integration Test: Skip the connectivity test (useful when the API is not yet accessible).
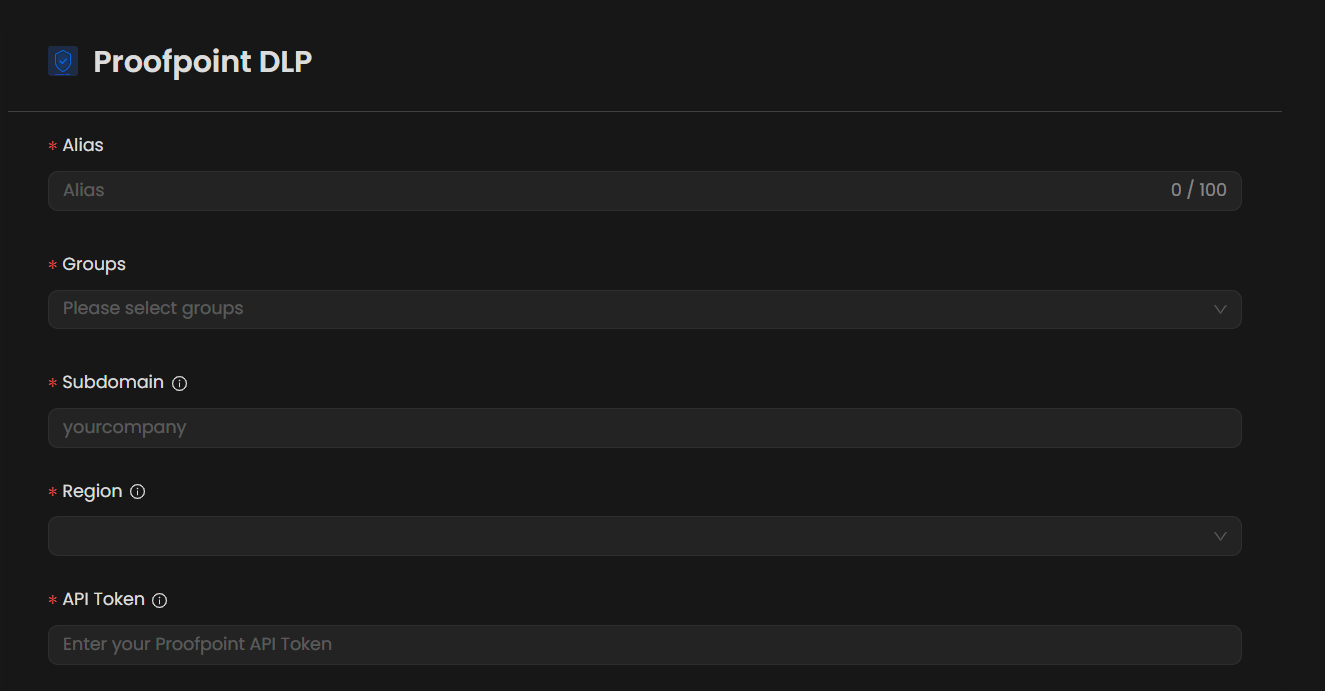
Double-check the information, then click Create to complete the integration.
After creating the integration, locate it under Integrations. Click the Play (▶) button in the Actions column to test and ensure your integration is configured correctly with autobotAI.

Additional Information
How to Retrieve Proofpoint API Token
To get your Proofpoint API Token, follow these steps:
-
Log in to Proofpoint:
- Go to your Proofpoint / Tessian dashboard and sign in with your account credentials.
-
Access Integrations:
- Navigate to Integrations → Security Integrations → Proofpoint API.
-
Generate the API Token:
- Ensure your user account has the Integrations and Security Events roles.
- Generate and copy the token directly from the dashboard.
-
Paste the API Token:
- Enter the API token into the API Token field on the autobotAI platform to complete the integration.
Once the API Token is added, test the integration to confirm functionality and connectivity with Proofpoint.