MISP
Overview
The MISP (Malware Information Sharing Platform) integration allows autobotAI to connect with your MISP instance to streamline the collection, sharing, and analysis of threat intelligence. MISP is an open-source threat intelligence platform that enables organizations to collaborate on cyber threat data effectively. By integrating MISP with autobotAI, you can automate the retrieval of indicators of compromise (IoCs) and enhance your threat detection capabilities.
This guide provides instructions for setting up the MISP integration in your autobotAI account. By completing this process, you will connect your MISP instance and its associated data to autobotAI.
Integration Field Details
| Field | Required | Description |
|---|---|---|
| Alias | Yes | A meaningful name or alias to identify this integration. |
| Groups | Yes | The integration group used for organizing this instance (similar to labels). |
| Host URL | Yes | The base URL of your MISP instance (e.g., https://192.168.0.1 or https://misp.example.com). |
| API Key | Yes | The API key from your MISP user account with appropriate read/write permissions. |
| Verify SSL Certificate | No | Whether to verify SSL certificates during API calls. Set to false for self-signed certificates. |
| Route Through Agent | No | Enables routing via an agent to access MISP instances within private/internal networks. |
Prerequisites
Before starting, ensure you have:
- A MISP instance accessible from the autobotAI platform.
- An MISP API key with read and write permissions.
Instructions for retrieving your API key can be found in the Additional Information section.
Steps to Set Up MISP Integration
Step 1:
Navigate to the Integrations page by selecting Integrations from the menu. Click the + Add Integration button in the top-right corner to view available integrations.
Step 2:
From the list, under Security Tools, select MISP + Add to create the MISP integration.
Step 3:
Fill the integration fields as described in the Integration Field Details section.
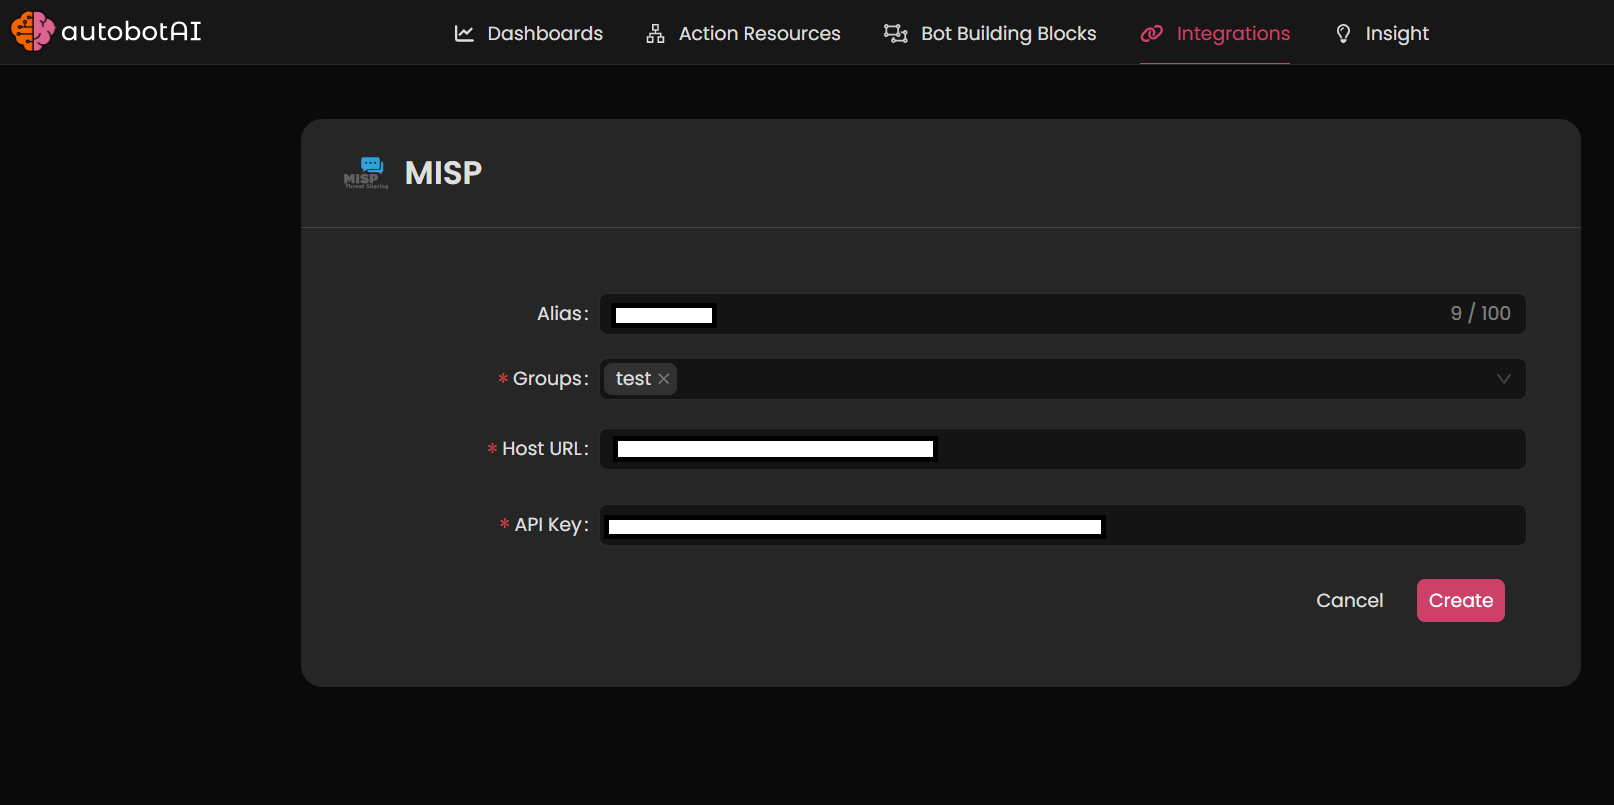
Note: This example demonstrates routing the request through a Kubernetes agent.
Double-check the information, then click Create to complete the integration.
Step 4:
After creating the integration, locate it under Integrations. Click on the three dots next to it, select Test, and ensure your integration is configured correctly with autobotAI.
Additional Information
How to Retrieve MISP API Key
-
Log in to MISP:
Access your MISP instance by navigating to its URL and logging in with your credentials. -
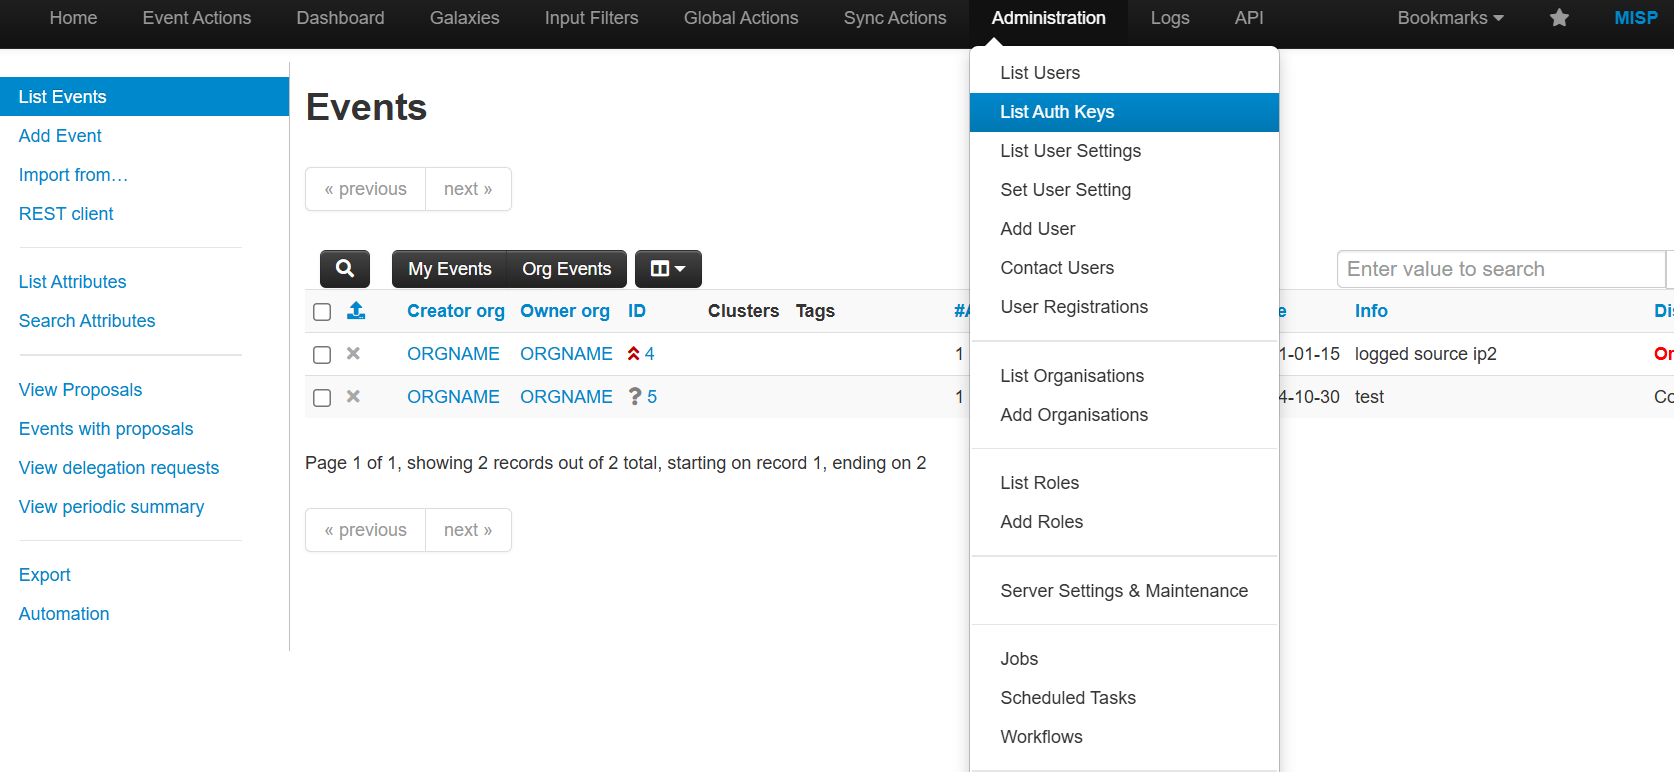
Access API Settings:
- Click on your profile in the top-right corner and select Administration.
- Locate the list Auth Keys section.
-
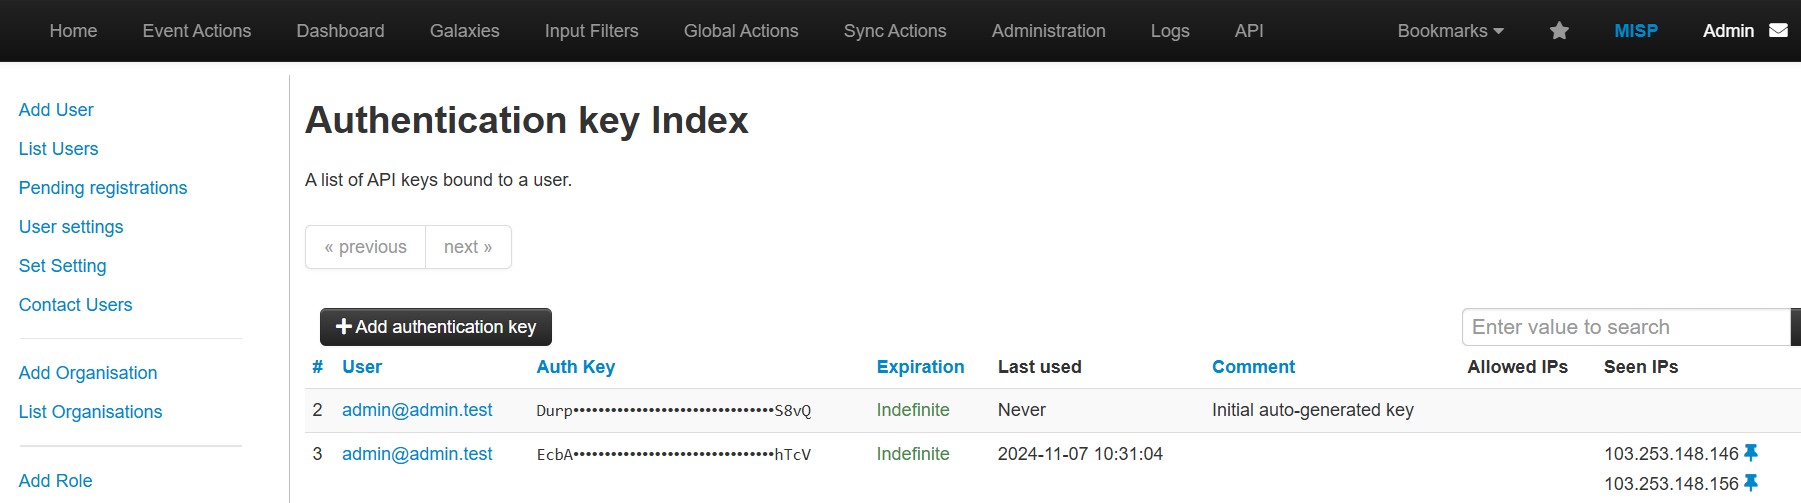
Copy API Key:
- If no API key exists, generate one by clicking on Add Auth Keys.
- Copy the generated Auth key.
-
Paste the Key:
Enter the key in the MISP Auth Key field on the autobotAI platform to complete the integration.
Once added, test the integration to confirm functionality and connectivity with your MISP instance.