
Overview
The Nessus integration allows autobotAI to connect with Tenable Nessus vulnerability assessment scanners to automate vulnerability discovery, launch security scans, and retrieve scan results across your IT infrastructure.
This guide provides step-by-step instructions for configuring the Nessus integration in your autobotAI account.
Prerequisites
Before starting, ensure you have:
- An active Nessus Scanner instance accessible from your network (typically running on port
8834). - API authentication credentials (Access Key and Secret Key) generated from your Nessus user profile.
Steps to Set Up Nessus Integration
Step 1:
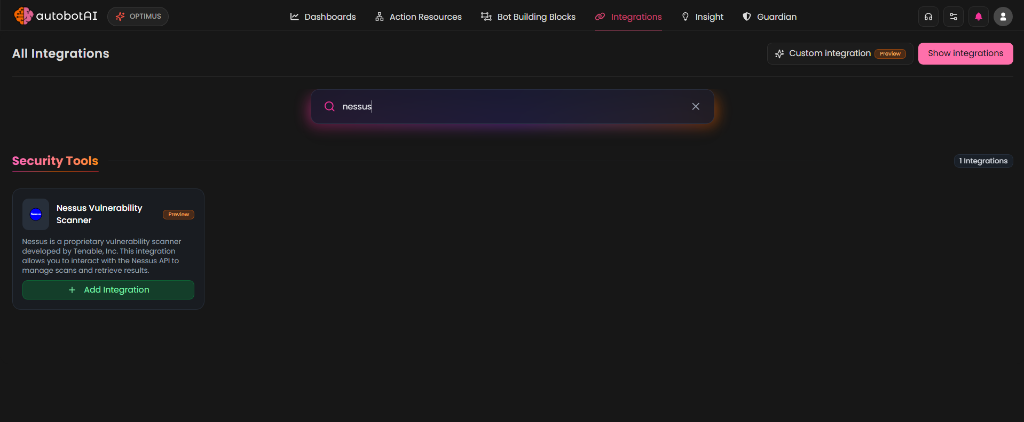
Navigate to the Integrations page by selecting Integrations from the left navigation menu. Search for Nessus in the catalog search bar.
Step 2:
Under Security Tools, locate the Nessus Vulnerability Scanner card and click + Add Integration to begin setup.
Step 3:
Fill in the required integration configuration fields:
- Alias*: Provide a clear identifier for this scanner instance (e.g.,
Nessus-Local). - Tag(Optional): Choose a tag to help organize the integration.
- Scanner URL*: Enter the full base URL of your Nessus server (e.g.,
https://localhost:8834). - Access Key*: Enter your generated Nessus API Access Key.
- Secret Key*: Enter your generated Nessus API Secret Key.
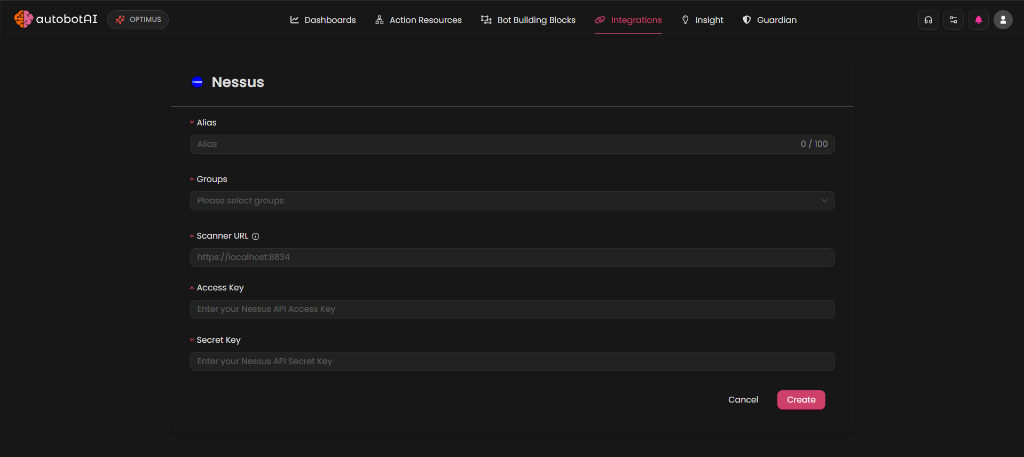
Double-check your credentials and click Create to register the integration.
Step 4:
After saving, locate your integration in the active list. Click the play button next to it to test the integration, and ensure the connection returns a successful validation status.
Additional Information
Generating API Keys in Nessus
- Log in to your Nessus scanner user interface.
- Navigate to Settings -> My Account -> API Keys.
- Click Generate to create a new
Access KeyandSecret Keypair. Make sure to copy and store them securely as they will not be shown again.