
Overview
The Custom Integration feature allows autobotAI to connect with any third-party REST API that does not have a built-in connector. You upload an OpenAPI or Swagger specification, define the connection form, and each API operation becomes an action you can use in bots and agents.
This guide provides instructions for creating a custom integration in your autobotAI account. By completing this process, you will define the integration type, add an instance with credentials, and verify connectivity.
Note: Custom integrations are available for your organization only.
Prerequisites
Before you begin, ensure you have:
- An OpenAPI 3 or Swagger 2 document (JSON or YAML) with HTTP operations under
paths. - The API base URL and authentication credentials for the service you want to connect.
- Optional logos for light and dark themes (SVG, PNG, or JPG).
Instructions for preparing the OpenAPI file and connection form can be found in the Additional Information section.
Steps to Set Up Custom Integration
Step 1:
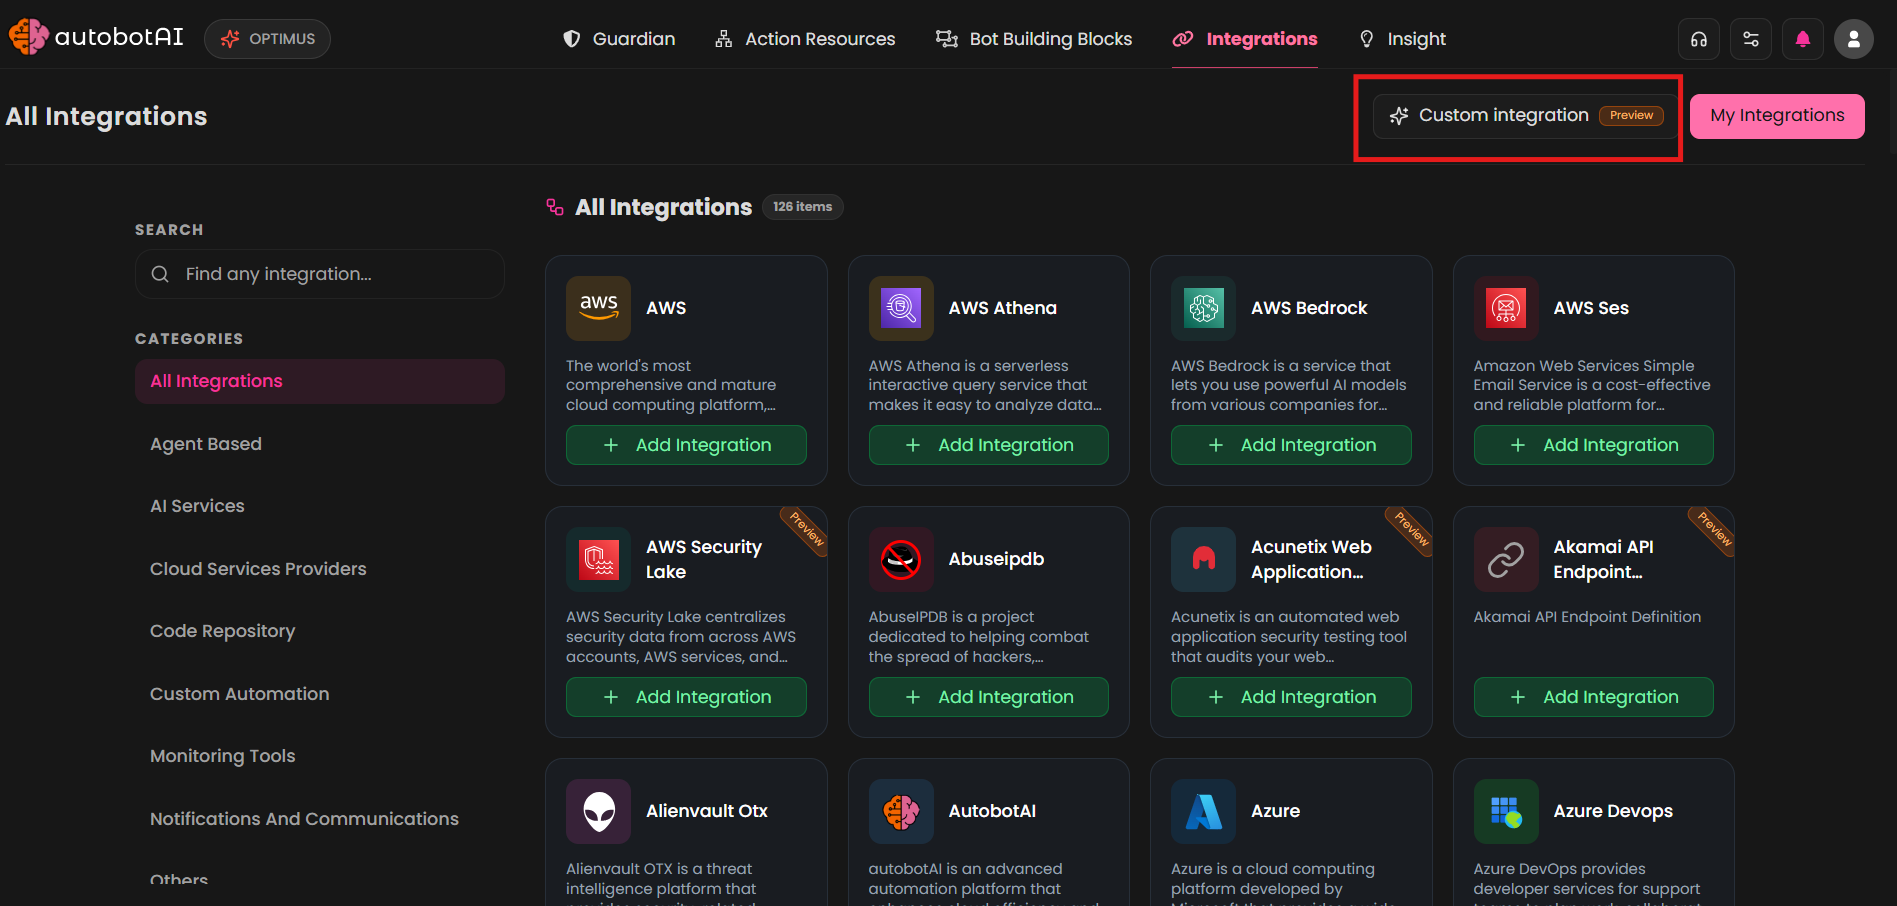
Navigate to the Integrations page by selecting Integrations from the menu. Click the Custom integration button in the top-right corner (next to My Integrations) to open the create wizard.
Step 2:
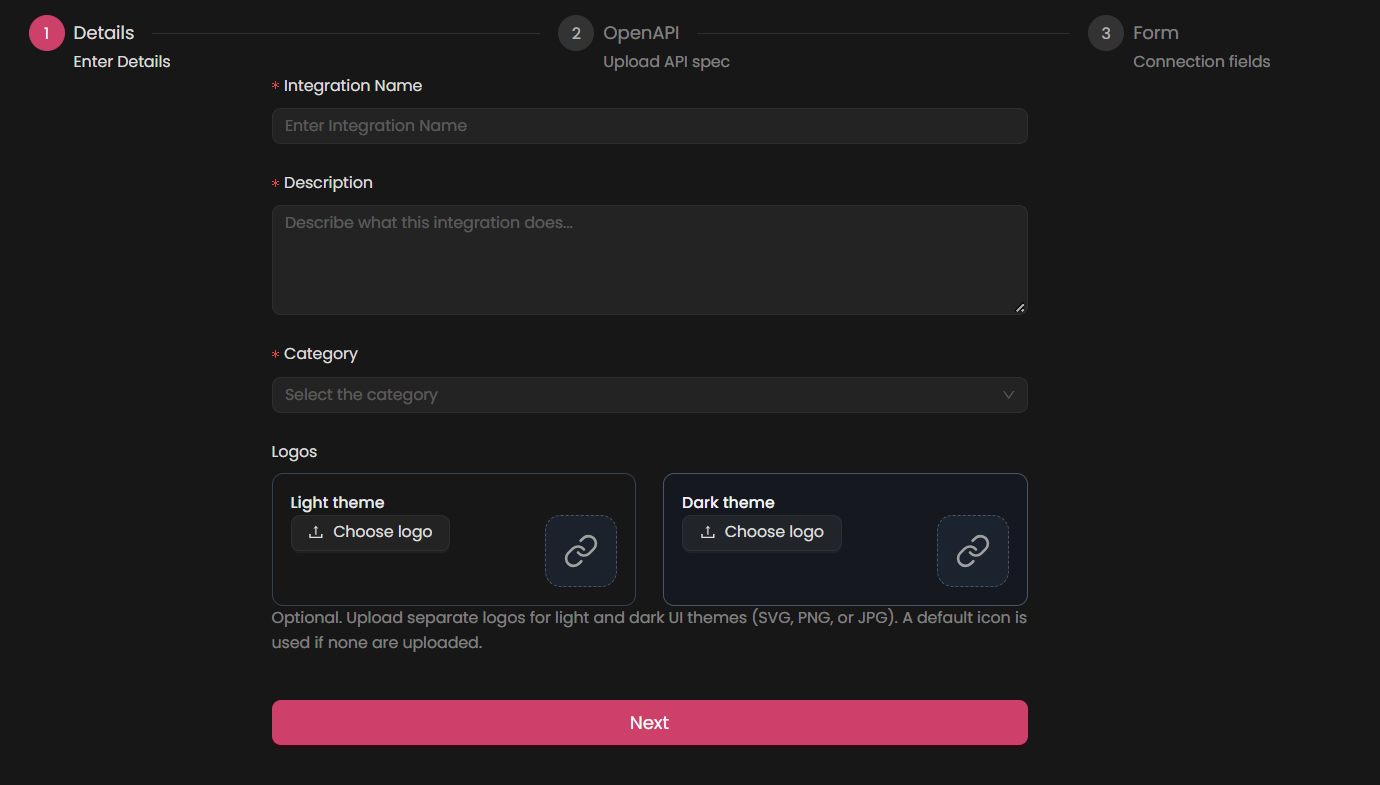
On the Details step, fill in the required fields as follows:
Note: Fields marked with an asterisk (*) are mandatory.
- Integration Name: Provide a meaningful name for this integration (for example,
Devo Query). The internal id is created automatically from this name. - Description: Describe what this integration connects to.
- Category: Select a marketplace category (for example, Security Tools, Monitoring Tools, Custom Automation, or Others).
- Logos (Optional): Upload separate logos for light and dark themes. A default icon is used if none are uploaded.
Click Next to continue.
Step 3:
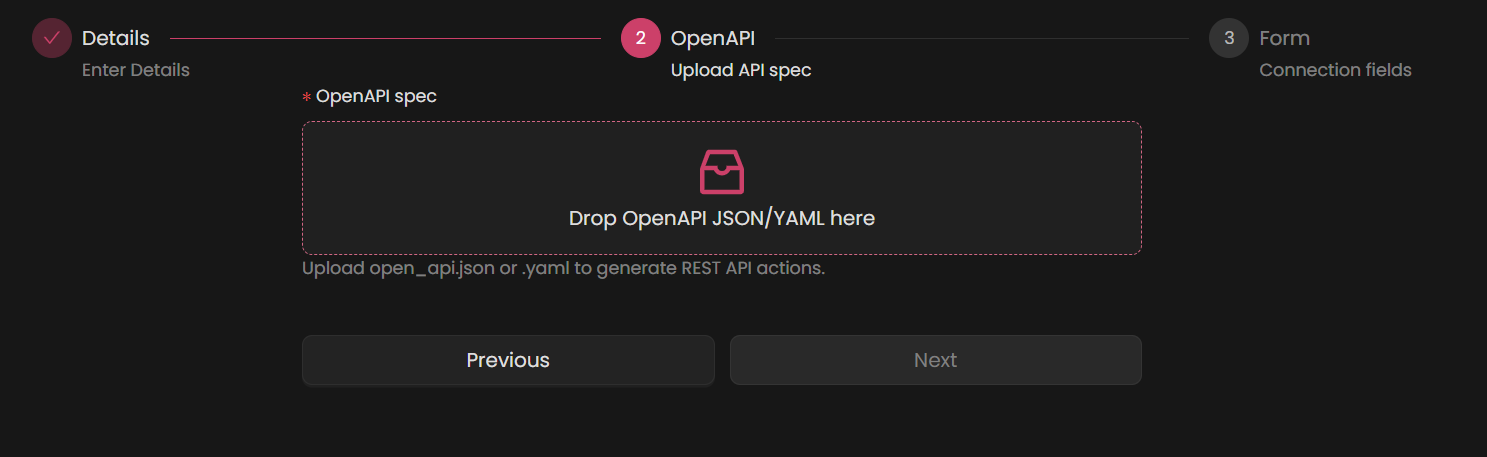
On the OpenAPI step, upload your OpenAPI or Swagger file (.json, .yaml, or .yml). Wait until the file is marked as valid, then click Next.
Step 4:
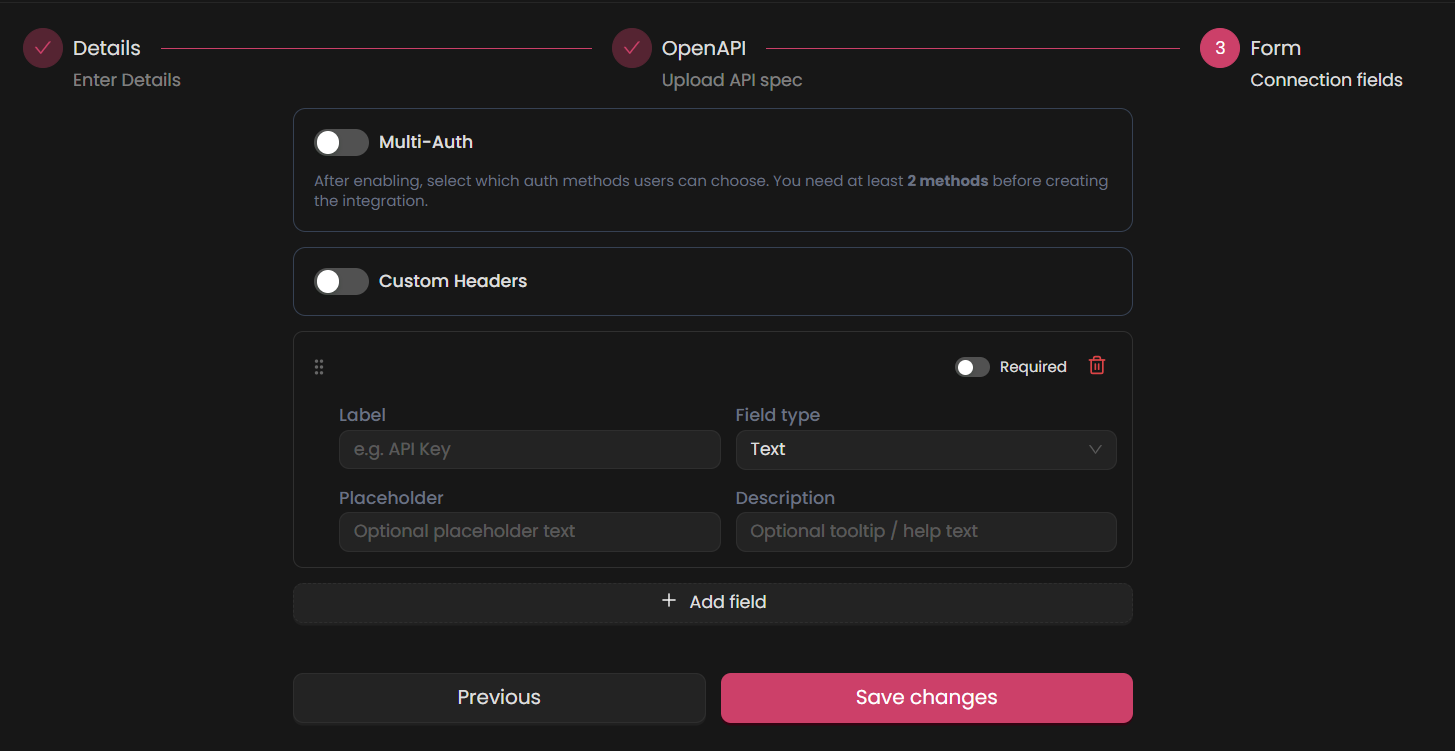
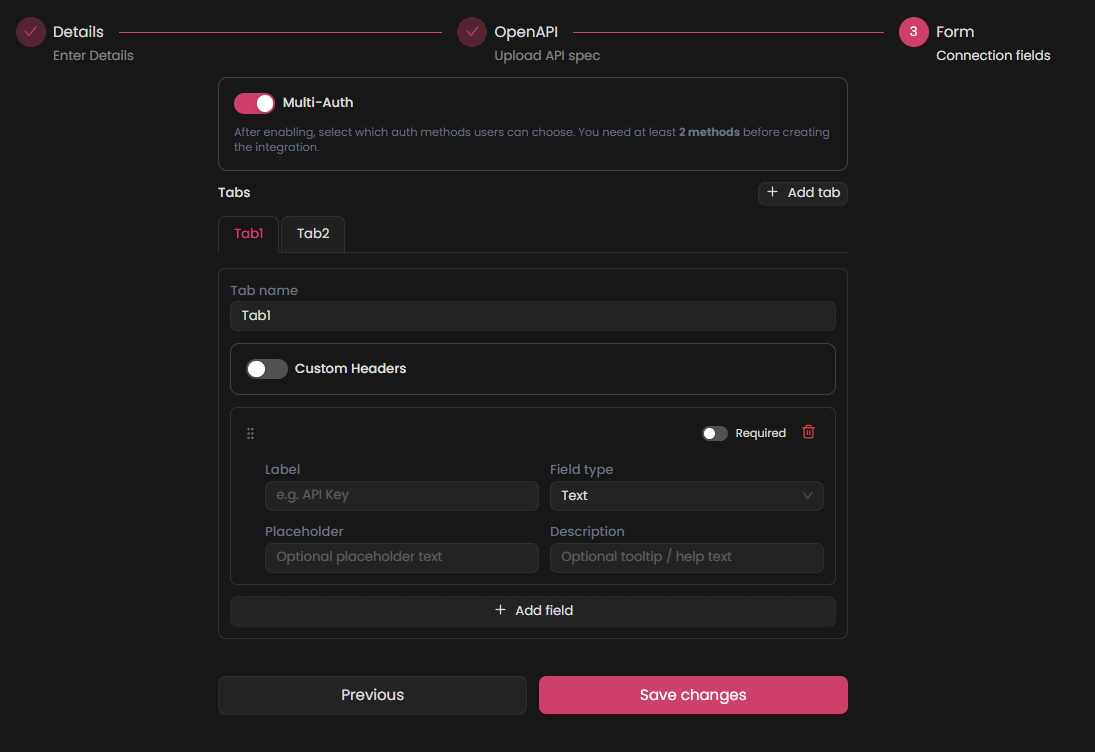
On the Form step, define the connection fields users will fill in when adding an instance.
Note: Add only the fields your API needs for authentication and connection. Do not add one field per API path or operation; those become actions from the OpenAPI spec.
Notice: Keep field names clear and meaningful. Do not combine different credentials into one label (for example, avoid Token API Key). Use a separate field for each value, such as API URL, Username, Password, Bearer Token, Client Id, Client Secret or API Key.
For a single authentication method:
- Leave Multi-Auth turned off.
- Click Add field for each connection field.
- For each field, set the Label, Type (Text, Password, URL, Text Area, Select, or JSON), and whether it is required.
- Optionally enable Custom Headers and enter header names (users provide the values when creating an instance).
For multiple authentication methods (Multi-Auth):
- Turn Multi-Auth on. You need at least two tabs.
- Rename each tab to the auth method (for example, Bearer Token or API Key).
- On each tab, add only the fields for that method.
- Optionally enable Custom Headers on the tab that needs them.
Step 5:
After verifying all entered information, click Create Integration. You are redirected to the new integration page so you can add an instance.
Step 6:
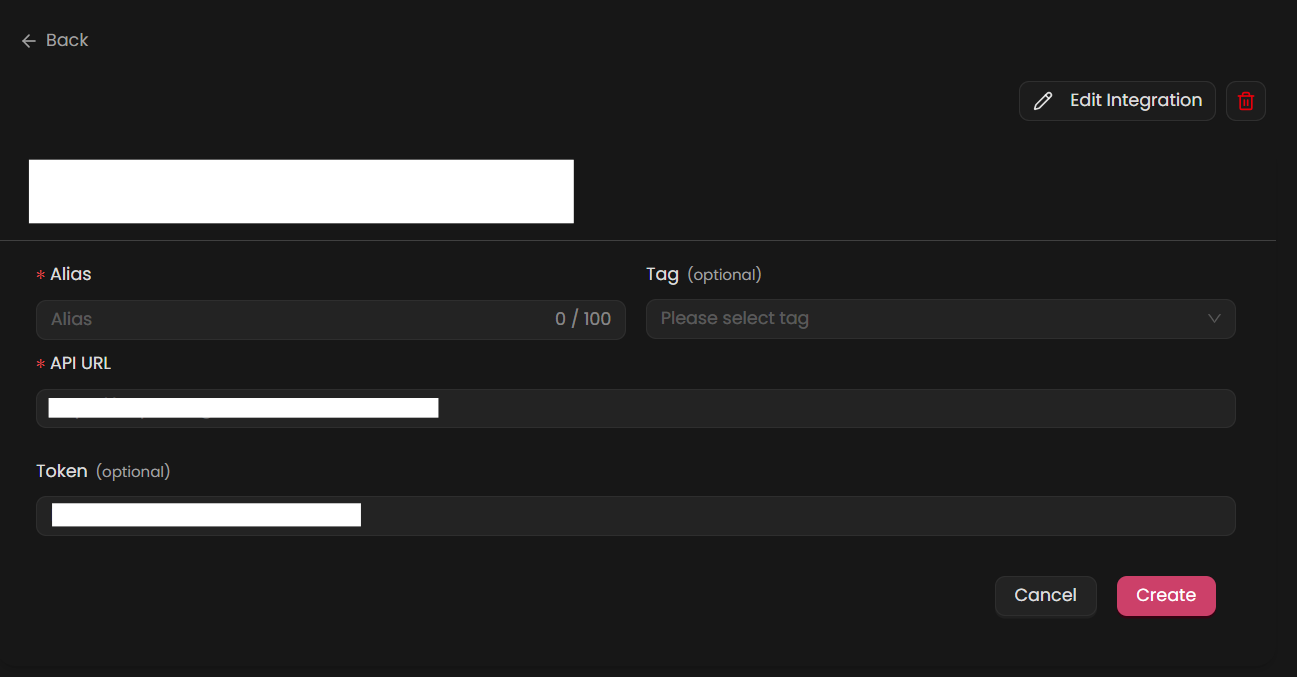
Fill in the required fields for the instance as follows:
Note: Fields marked with an asterisk (*) are mandatory. The connection fields displayed here depend directly on what you defined in the form during Step 4.
- Alias: Provide a meaningful name or alias for this integration instance.
- Tag (Optional): Choose a tag to help organize the integration.
- Connection Fields: Whatever fields you set up during form creation (Step 4) are displayed here. For example, if you added an API URL, Bearer Token, or API Key while creating the form, those exact fields appear here for you to enter the actual connection values and credentials. If Multi-Auth was configured, select the relevant authentication tab and enter the required details.
Double-check the information, then click Create to complete the instance setup.
Step 7:
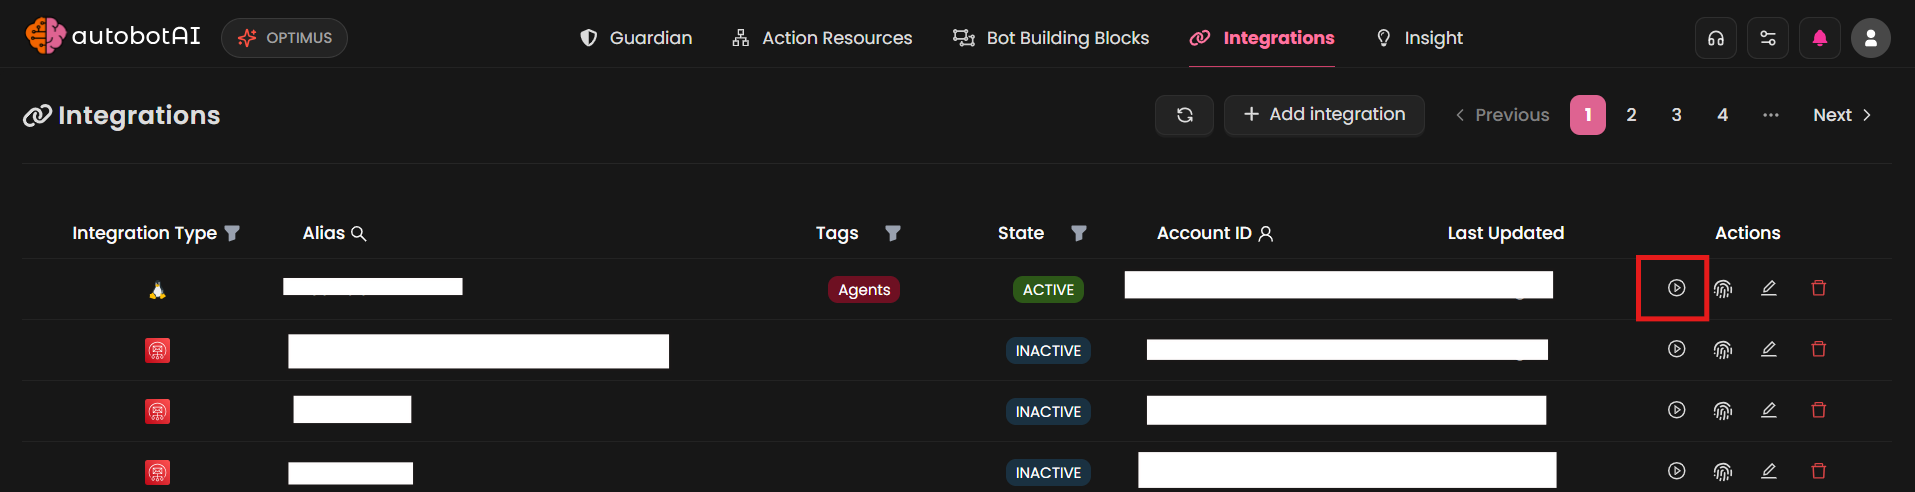
After creating the instance, locate it under Integrations. Click on the three dots next to it, select Test, and ensure your integration is configured correctly with autobotAI.
Additional Information
How to Prepare the OpenAPI Spec
- Export or download the OpenAPI 3 or Swagger 2 document for your API (JSON or YAML).
- Confirm the file includes at least one HTTP operation under
paths. Each operation becomes an action in autobotAI. - Prefer setting the server URL to
{base_url}so the instance API URL is used at runtime:
json"servers": [{ "url": "{base_url}" }]
- Upload the file on the OpenAPI step of the wizard. If the upload is rejected, fix the JSON/YAML or add missing operations and try again.
How to Edit or Delete a Custom Integration
Edit:
- Open the custom integration from the marketplace or instance page.
- Select Edit to return to the wizard (Details, OpenAPI, Form).
- Update logos, replace the OpenAPI file, or change connection fields, then click Save changes.
Existing logos and the OpenAPI file are kept unless you upload replacements.
Delete:
Deleting a custom integration permanently removes the integration type, its OpenAPI file, all connected instances, and related actions. Bots that reference this integration may stop working. You must type the integration name to confirm deletion.
Once the instance is added, test the integration to confirm connectivity with your API.