
Azure Entra ID
Overview
The Azure Entra ID integration enables autobotAI to manage identities and access within your Azure environment. This integration supports automated user provisioning, group management, and access control policies—streamlining identity management, enhancing security, and ensuring compliance with organizational policies directly from the autobotAI platform.
This guide provides instructions for setting up the integration in your autobotAI account. Once complete, your Azure Entra ID account and its associated resources will be connected to autobotAI.
Prerequisites
Before starting, ensure you have the following Azure Entra ID details:
- Tenant ID
- Client ID
- Client Secret
You can gather these details from the Azure Portal. Follow the steps in the Additional Information section to retrieve them.
Steps to Set Up Azure Entra ID Integration
Step 1:
Navigate to the Integrations page by selecting Integrations from the menu. Click the + Add Integration button in the top-right corner to view the list of available integrations.

Step 2:
Under Cloud Service Providers, select Azure Entra ID + Add to create the Azure Entra ID integration.

Step 3:
Fill in the required information in the provided fields:
Note: Fields marked with an asterisk (*) are mandatory.
- Account Name/Alias: Provide a meaningful name or alias for this integration.
- Groups: Use groups to organize multiple integrations, similar to labels.
- Tenant ID: Enter the Tenant ID of your Azure Entra ID account.
- Client ID: Enter the Client ID of your Azure Entra ID account.
- Client Secret: Enter the Client Secret of your Azure Entra ID account.
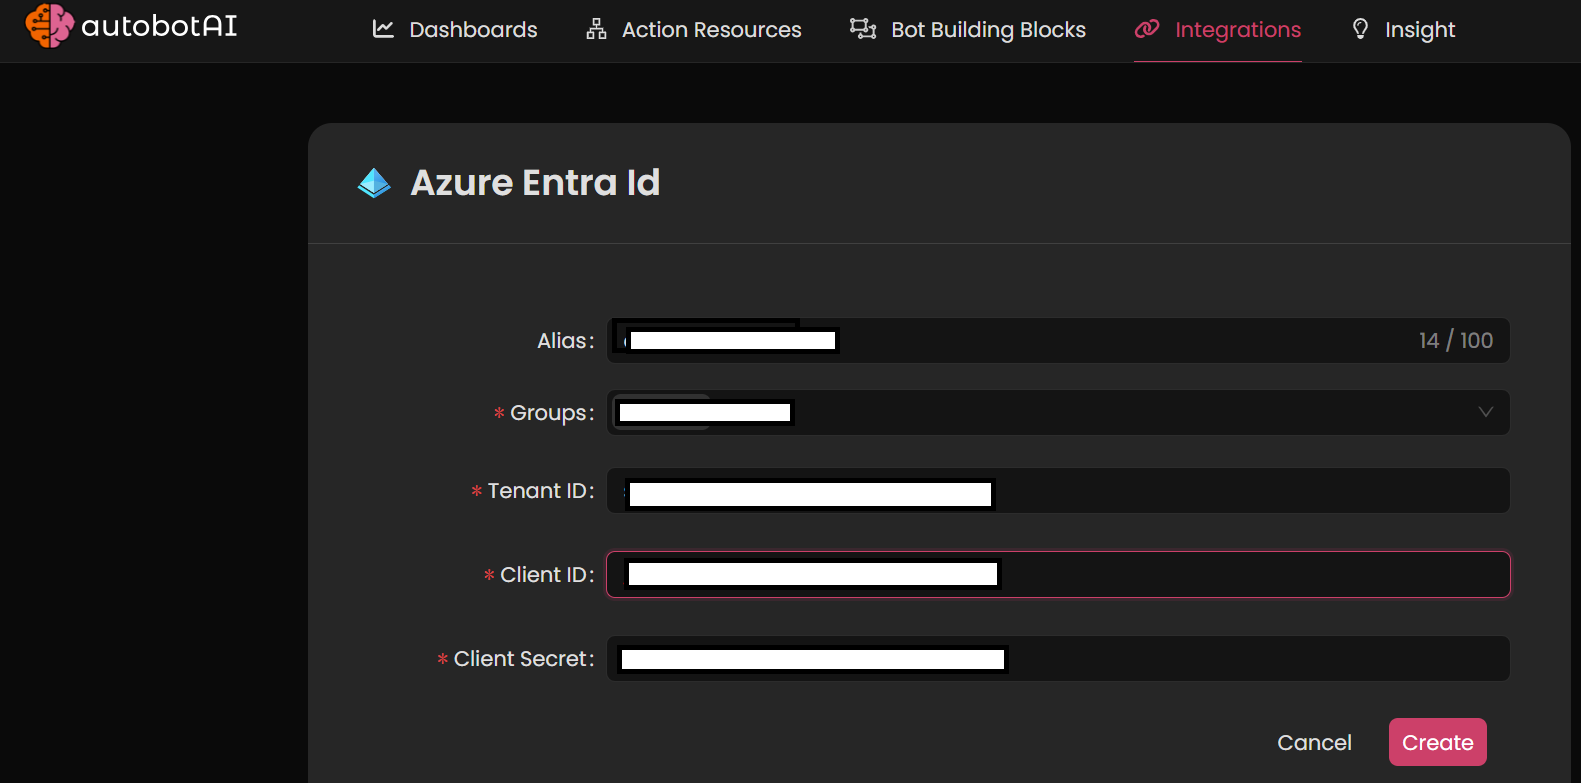
Verify that all information is correct, then click Create to finalize the integration.
Step 4:
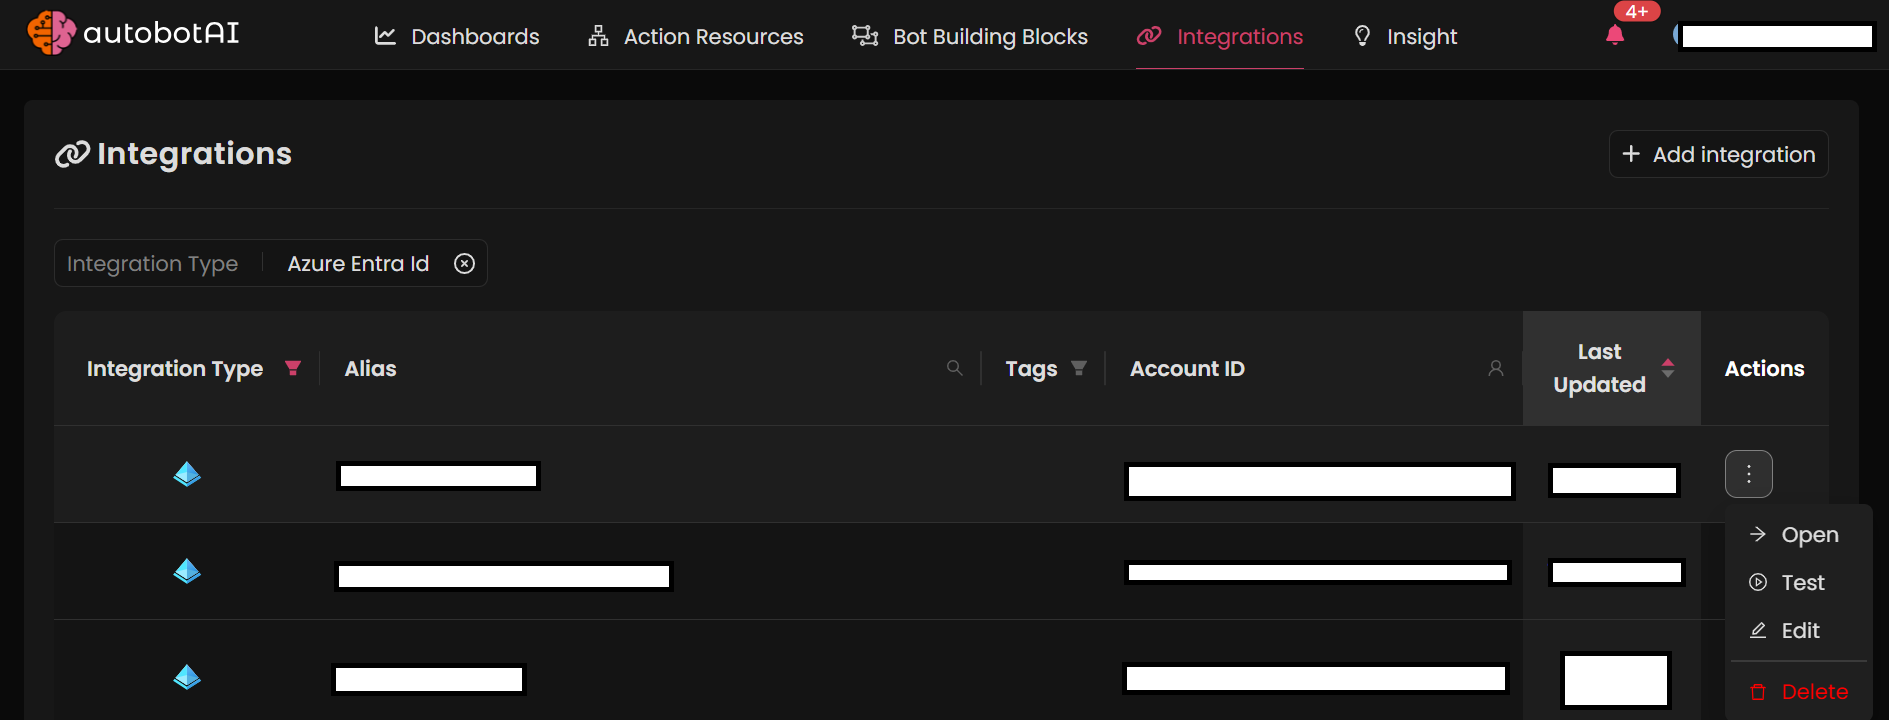
After the integration is created, locate it under Integrations. Click on the three dots next to the integration, select Test, and ensure that your configuration is successfully connected with autobotAI.
Additional Information
How to Retrieve Tenant ID, Client ID, and Client Secret in the Azure Portal
To integrate your Azure Entra ID account, collect the following information from the Azure Portal:
-
Log in to the Azure Portal:
Go to the Azure Portal and sign in with your credentials. -
Create an Azure AD App Registration (if needed):
-
In the left-hand sidebar, select Azure Active Directory.
-
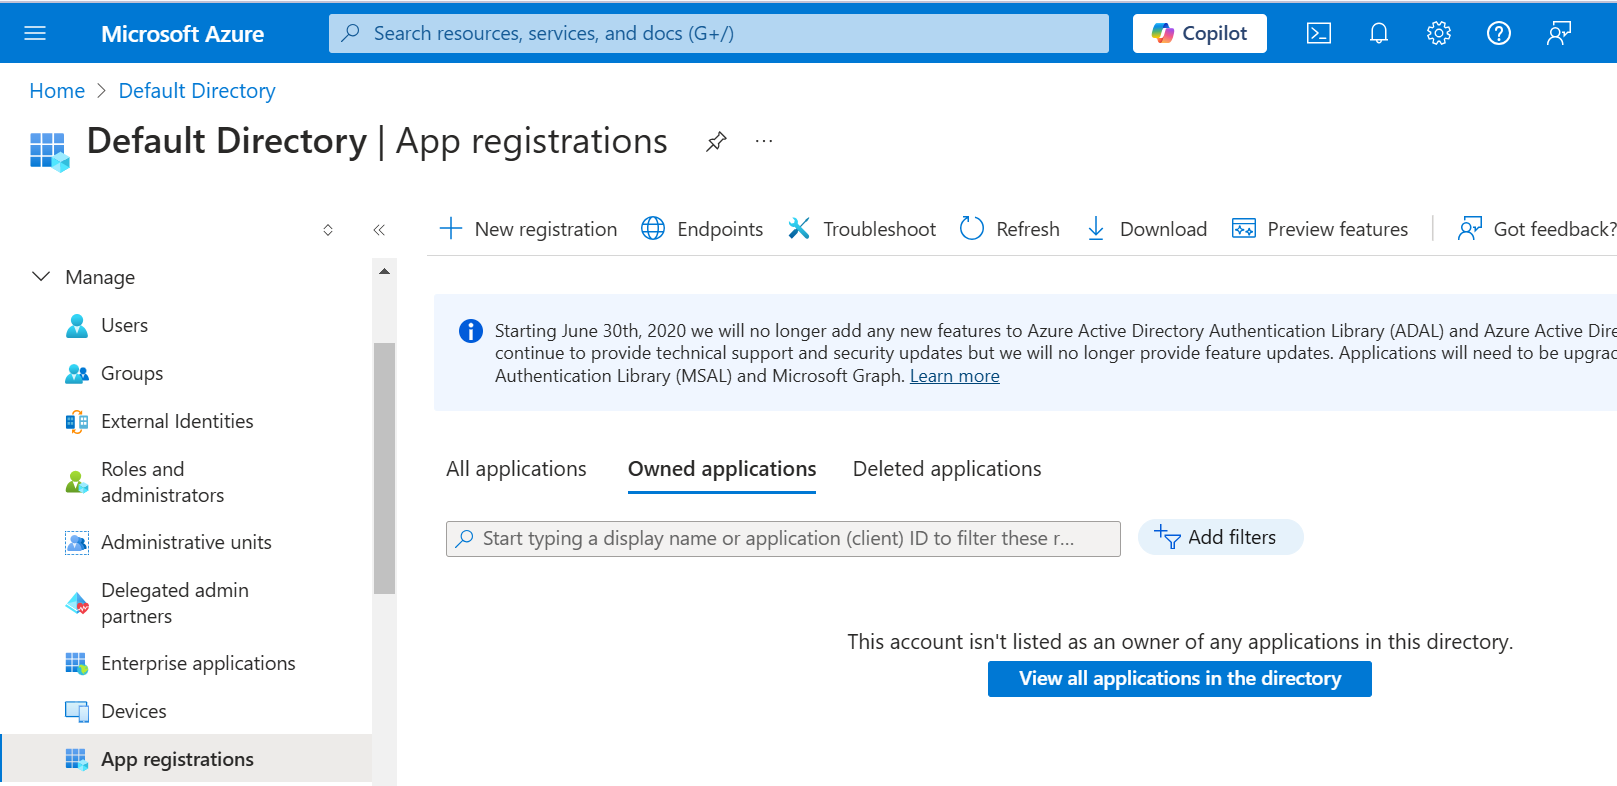
Navigate to App registrations and click on + New registration.
-
Complete the necessary fields, including the app name, and set the supported account type.
-
Click Register to create the app.
-
-
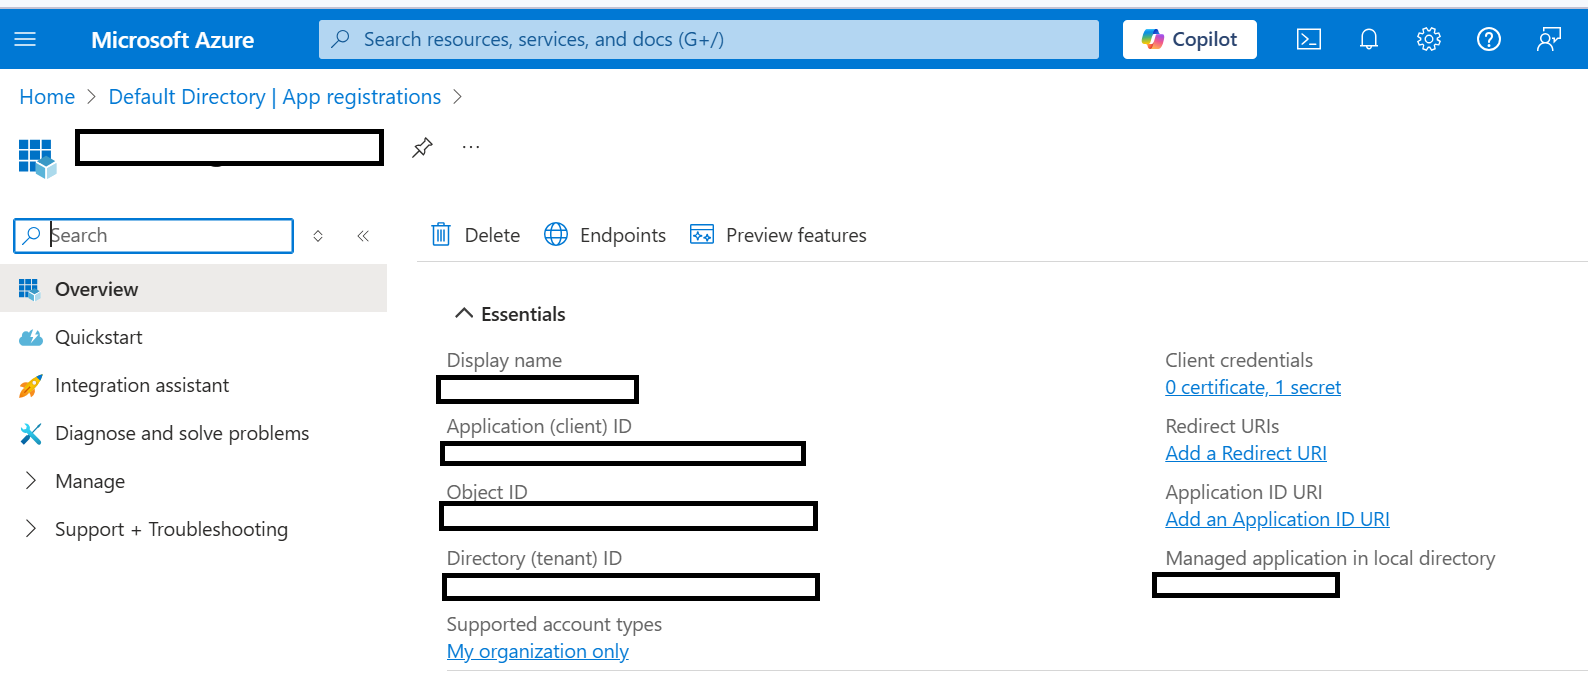
Retrieve the Tenant ID:
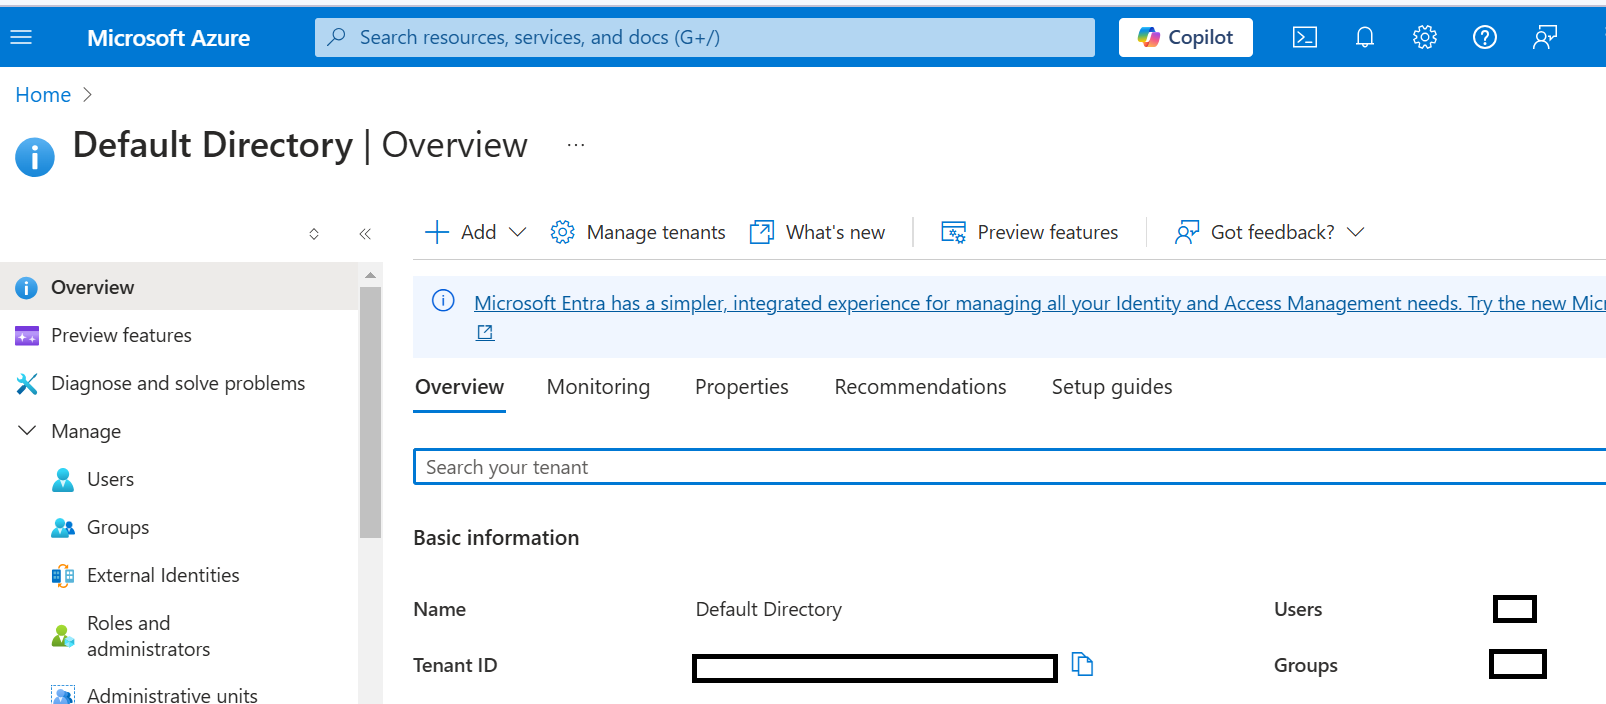
- In Azure Active Directory, go to Overview.
- Copy the Directory (Tenant) ID from the Tenant Information section. This is your Tenant ID.
-
Retrieve the Client ID:
- In App registrations, locate and select your app.
- Copy the Application (Client) ID from the app's Overview page. This is your Client ID.
-
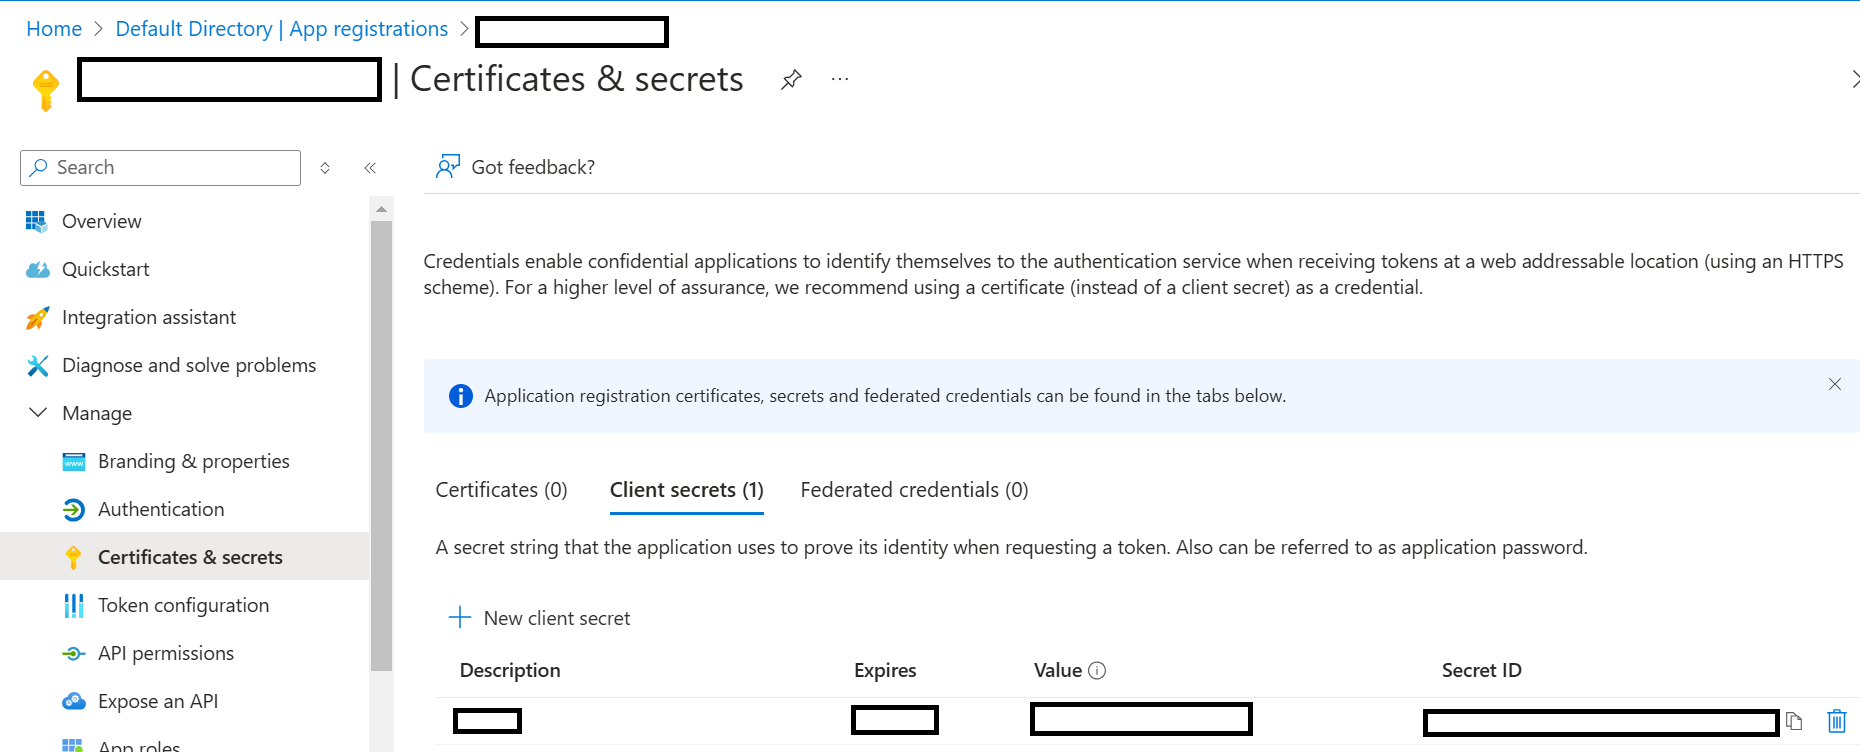
Create and Retrieve the Client Secret:
- In your app's App registrations page, navigate to Certificates & secrets.
- Under Client secrets, click + New client secret.
- Add a description, set an expiration period, and click Add.
- Copy the Value immediately, as it will not be accessible once you leave the page. This is your Client Secret.
Once you have gathered all required credentials (Tenant ID, Client ID, and Client Secret), enter them in the corresponding fields on the autobotAI platform to complete the Azure Entra ID integration.